Setting Modem Allied Telesyn
Langkah 1:
Klik Start =>>>>>>>>>>> Control Panel
Langkah 2 :
Double klik Network Connection icon
Langkah 3 :
double klik pada Local Area Connection icon kemudian klik Properties
Langkah 4:
pilih Internet Protocol (TCP/IP) dan klik Properties
Langkah 5 :
pilih Obtain an IP address automatically and Obtain DNS server address automatically, kemudian klik OK
Langkah 6 :
masukkan alamat web Port ADSL 2/2 Router’s default IP address :192.168.1.1 pada kotak Address, kemudian tekan enter
Langkah 7 :
masukkan Username :manager dan Password : friend, kemudian klik Log In
masukkan Username :manager dan Password : friend, kemudian klik Log In
Langkah 8 :
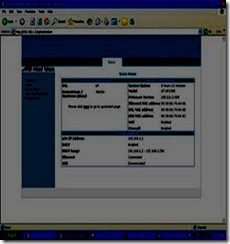
setelah Log In, anda akan masuk pada ALLIED TELESYN AT-AR236E-S Home
setelah Log In, anda akan masuk pada ALLIED TELESYN AT-AR236E-S Home
Langkah 9 :
Klik Advanced > WAN > ADSL modulation
Klik Advanced > WAN > ADSL modulation
Langkah 10 :
pada layar akan muncul tampilan berikut:
pada layar akan muncul tampilan berikut:
Pada Modem Setup, pilih settingan ADSL-G.dmt, klik Apply
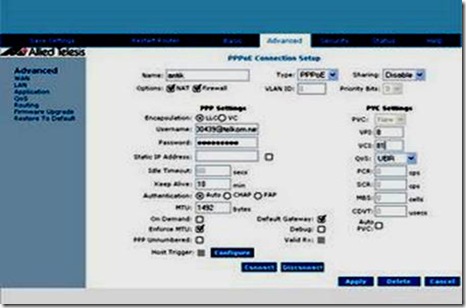
Klik Advanced > WAN > New Connection
Kolom Name diisi, misal : antik
.Kolom Type>>>>>> pilih settingan PPPoE
.Kolom username diisi nomer speedy diikuti @telkom.net, misalnya172102216459@telkom.net VPI : 8, VCI : 81
.Kolom password diisi sesuai dengan password yang diperoleh
.Klik Apply
.Klik Save Setting
.Kolom Type>>>>>> pilih settingan PPPoE
.Kolom username diisi nomer speedy diikuti @telkom.net, misalnya172102216459@telkom.net VPI : 8, VCI : 81
.Kolom password diisi sesuai dengan password yang diperoleh
.Klik Apply
.Klik Save Setting
Modem ALLIED TELESYN sudah connect dan siap melakukan browsing >>>>
adsl Modem Repotec
Type PPPOE
a. open Internet
Explorer ketik : http://192.168.1.1
b. Username : admin & Password : epicrouter
c. Click : OK
class=”MsoNormal”>Click WAN
a. Pic Adapter : Pvc0
b. Click Submit
c.Virtual Circuit = Enabled
d. Bridge & IGMP = Disabled
e.
Each region was different from another region and for Bandung vpi :8 , vci : 81
f.Service Category = UBR without PCR
g.Protocol-Conection type = PPPoE
h.Encapsulation = LLC-Snap-Bridging
i. Put Username & Password from your provider
j. and Than click Submit.
k. click Save Configuration
wait till Saving configuration done
l. put DNS : 202.134.0.155 & 202.134.2.5
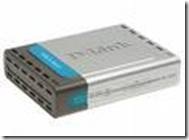
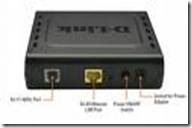
Adsl Modem D-Link
D-Link
DSL-302T
Default IP: 192.168.1.1
Default username : admin
Default password : admin
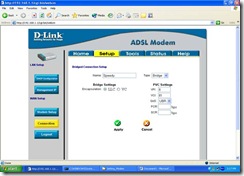
Setting Bridge
1. Click Setup
2. Click Connection
3. Bridge Connection Setup. Name: Speedy; Type: Bridge; Encapsulation: LLC; VPI=8; VCI=81, Apply
4. Click Tools
5. Click System Commands, Save All, Restart
Setting PPPoE/Router
1. Click Setup
2. Click Connection
3. Bridge Connection Setup. Name: Speedy; Type: PPPoE; Username: (nmrspeedy@telkom.net); Password: (password from provider); VPI=8; VCI=81, Apply
4. Click Tools
5. Click System Commands. Save All, Restart
DSL-302T
Default IP: 192.168.1.1
Default username : admin
Default password : admin
Setting Bridge
1. Click Setup
2. Click Connection
3. Bridge Connection Setup. Name: Speedy; Type: Bridge; Encapsulation: LLC; VPI=8; VCI=81, Apply
4. Click Tools
5. Click System Commands, Save All, Restart

Setting PPPoE/Router
1. Click Setup
2. Click Connection
3. Bridge Connection Setup. Name: Speedy; Type: PPPoE; Username: (nmrspeedy@telkom.net); Password: (password from provider); VPI=8; VCI=81, Apply
4. Click Tools
5. Click System Commands. Save All, Restart
Adsl Modem Linksys
Linksys
AM300
AM300
Default IP: 192.168.1.1
Default username : admin
Default password : admin
Setting Bridge
1. Click Setup
2. Click Basic Setup
3. ADSL Settings, Encapsulation: RFC 1483 Bridged, Autodetect: Disable, VPI: 8, VCI: 81, Multiplexing: LLC, DSL Modulation: Auto
4. Click Save Settings
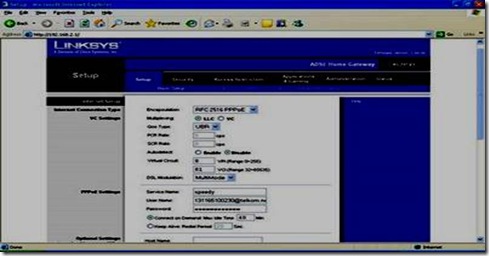
Setting PPPoE/Router
1. Click Setup
2. Click Basic Setup
3. ADSL Settings, Encapsulation: RFC 2516 PPPoE, Autodetect: Disable, VPI: 8, VCI: 81, Multiplexing: LLC, DSL Modulation: Auto
4. PPPoE Settings: Username: (nmrspeedy@telkom.net), Password: (password From provider), Keep Alive
5. Click Save Setting

Modem Prolink
a. Login To -> http :// 10.0.0.2User Name : admin
Password : password
Click OK
b.Chose Configurasi WAN :
c.Select Adapter : Pilih PVC-3 (Indonesia)
d.Edit Field :
Bridge = Enable
Encapsulation = 1483 Bridge IP LLC
ATM VPI = 8ATM VCI = 81
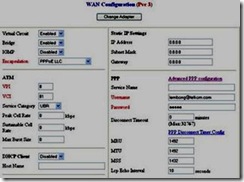
d.Static IP Setting : >just blank <
IP Address = just empty
Subnet Mask = just empty
Gateway = just empty
User Name = username@telkom.com ( optional )
Password = xxxxxxxx ( optional )
If you choose to put username & password there just double clik explorer ,
Password : password
Click OK
b.Chose Configurasi WAN :
c.Select Adapter : Pilih PVC-3 (Indonesia)
d.Edit Field :
Bridge = Enable
Encapsulation = 1483 Bridge IP LLC
ATM VPI = 8ATM VCI = 81

d.Static IP Setting : >just blank <
IP Address = just empty
Subnet Mask = just empty
Gateway = just empty
User Name = username@telkom.com ( optional )
Password = xxxxxxxx ( optional )
If you choose to put username & password there just double clik explorer ,
If you not choose to put username & password there you have to create new connection at Network Connection
6.Create New Connection (Bridge) See here..>>
e.Than Next :
6.Create New Connection (Bridge) See here..>>
e.Than Next :
Click Submit
Click Save Configuration
Next : Save Reboot ….
TP-Link
Default IP: 192.168.1.1
Default username : admin
Default password : admin
Setting Bridge
1. click Advanced Setup
2. click WAN
3. Find VPI/VCI: 8/81, click Edit
4. ATM PVC Configuration, VPI=8; VCI=81, Service Category: UBR Without PCR, Next
5. Connection Type Bridging, Encapsulation Mode LLC/SNAP-BRIDGING, Next
6. Cheklist Enable Bridge Service, Service Name: Speedy, Next
7. WAN Setup – Summary, Save
8. Save/Reboot

Setting PPPoE
Default IP: 192.168.1.1
Default username : admin
Default password : admin
Setting Bridge
1. click Advanced Setup
2. click WAN
3. Find VPI/VCI: 8/81, click Edit
4. ATM PVC Configuration, VPI=8; VCI=81, Service Category: UBR Without PCR, Next
5. Connection Type Bridging, Encapsulation Mode LLC/SNAP-BRIDGING, Next
6. Cheklist Enable Bridge Service, Service Name: Speedy, Next
7. WAN Setup – Summary, Save
8. Save/Reboot

Setting PPPoE
1. click Advanced Setup2. click WAN
3. find VPI/VCI: 8/81, click Edit
4. ATM PVC Configuration, VPI=8; VCI=81, Service Category: UBR Without PCR, Next
5. Connection Type PPP over Ethernet (PPPoE), Encapsulation Mode LLC/SNAP-BRIDGING, Next
6. Put your PPP Username: (nmrspeedy@telkom.net); PPP Password: (password from provider); PPPoE Service Name: Speedy, Next
7. Cheklist Enable WAN Service, Service Name: Speedy, Next
8. WAN Setup – Summary, Save
9. Save/Reboot
P-660R
Default IP: 192.168.1.1
Default username : admin
Default password : 1234
Setting Bridge
1. choose Network
2. choose WAN
3. Mode: Bridge, Encapsulation: RFC 1483, Multiplexing: LLC, VPI: 8, VCI: 81, Apply
4. choose Maintenance
5. choose Tools
6. Restart
Setting PPPoE
1. choose Network
2. choose WAN
3. Mode: Routing, Encapsulation: PPPoE, Username: (nmrspeedy@telkom.net), Password: (password speedy), Service Name: Speedy, Multiplexing: LLC, VPI: 8, VCI: 81, IP Address: Obtain an IP Address Automatically, Connection: Nailed-Up Connnection, Apply
4. click Maintenance
5. click Tools
6. Restart
Langkah 1:
klik Start => Control Panel
Langkah 2 :
Double klik Network Connection Icon
Langkah 3 :
double klik pada Local Area Connection kemudian pilih General dan klik Properties
Langkah 4 :
pilih Internet Protocol (TCP/IP) dan klik Properties
Langkah 5 :
Pilih Obtain an IP address automatically and Obtain DNS server address automatically, kemudian klik OK
Langka 6 :
Masukkan alamat web Port ADSL 2/2 Router’s default IP address : ”192.168.1.1” pada kotak Address, kemudian tekan enter.
\

Langka 7 :
Masukkan Username : admin dan Password admin, kemudian klik OK
Langka 8 :
Setelah Log In, anda akan masuk pada SANEX’s Home
Klik Advanced Setup => Klik Edit
Kolom VPI diisi 8
Kolom VCI diisi 81, kemudian klik Next
Pilih settingan PPP over Ethernet (PPPoE) pada Connection Type => klik Next
Kolom username diisi nomer speedy diikuty @telkom.net, misalnya 111212223244@telkom.net
Kolom Password diisi sesuai dengan password yang diperoleh => Next lalu Klik Next lagi
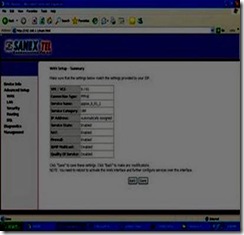

Lalu Klik Save
Klik Save/Reboot
Untuk memastikan apakah modem sudah connect atau belum, klik Device Info
Ada tulisan This information reflects the current status of your DSL connection.
modem SANEX telah berhasil di install
Langkah 9:
modem SANEX sudah connect dan siap melakukan browsing dengan memasukkan alamat web pada kolom Address, misalnya www.google.com, www.friendster.com, www.jobkerja.blogspot.com
Aztech
Default IP: 192.168.1.1
Default username : admin
Default password : admin
Setting Bridge
1. Click Advanced
2. Click WAN
3. Click New Connection
4. Connection Name: Speedy, Type: Bridge, VPI: 8, VCI: 81, and Submit.
5. Save Settings
6. Restart Router
Setting PPPoE/Router
1. Click Advanced
2. Click WAN
3. Click New Connection
4. Connection Name: Speedy, Type: PPPoE, Sharing: Enable, Encapsulation: LLC, Username: (nmrspeedy@telkom.net), Password: (password from provider), VPI: 8, VCI: 81, and Submit.
5. Save Settings
6. Restart Router
1.Login To : http ://192.168.1.254
2.User name = admin
Password = password
Click -> OK
3.Click : Quick Start
4.Edit Connection :
Encapsulation = PPPoE LLC
Bridge = Enabled
Setting VPI = 8 dan VCI = 81 , and Than
Static IP Setting
IP Address = 0.0.0.0
subnet mask = 0.0.0.0
Gateway = 0.0.0.0
5.Click : – Submit
- SAVE CONFIG
6.Click : Submit
7.Wait Till process Configuration done !
8.Configuration Done !
Now try to Browse..!
Semoga bermanfaat buat para pembaca yang mau menimba ilmu











Tidak ada komentar:
Posting Komentar